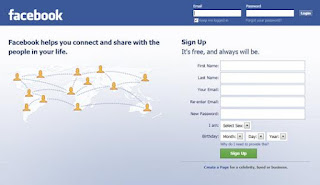
Why Facebook is Blue in Color?When you open Facebook, the first thing that you notice is the blue color it uses. Ever wondered why is Facebook so blue in color and not changing its color scheme?Ever since they started as 'thefacebook', Facebook has stayed with the blue color. Although major changes have been made in the Facebook theme since then, the major unchanged thing has been the blue color.
Facebook from its early days when it was known as thefacebook
An exciting fact: In its earlier days, thefacebook.com required you to have an .edu email id to join.Everywhere from its login page to Facebook groups, you find only blue.
Facebook Login Page. All Blue!
The reason for this is that Mark Zuckerberg, the young founder of Facebook is red-green color-blind and blue is the richest colour for him which he confirmed in an online interview with Leo Laporte.Another important commercial factor for using blue color is the fact that most colors tend to distract the viewers. Blue on the other hand acts as a transparent background to the main content as visible to the human brain due to which most popular websites tend to use the blue color. It can easily be called a webmaster's favorite color. Blue color is also sometimes referred to as 'Nirvana' for the brain.
All these factors make blue a prominent color on Facebook.
So much for the much-hyped post-PC era. Rather than serving as the final days of the laptop, 2015 brought us some of the best laptops ever created, with an eye toward beautiful design. And at the top of the heap was Dell’s fantastic XPS 13. Yes, dude. Dell just got Best Laptop of the Year.
With its stunningly lightweight and beautiful design, the Dell XPS 13 absolutely blew away the competition. That’s because the XPS 13 crams a 13-inch display into the body of an 11-inch laptop. Heck, this thing makes Apple’s 13-inch Mac Book Air look like a giant.
If you've got the cash ($1,600), you can outfit the XPS with a slew of impressive features, including a powerful Intel Core i7 processor, 8 gigabytes of RAM, a super fast 256-gigabyte solid-state drive, and a gorgeous 3200-by-1800-pixel touchscreen display.
You don’t have to spend that much on the XPS 13, though. Dell offers an $800 version that, while less powerful, is still every bit as attractive. Oh, and did I mention it runs Windows 10?
Yes, this Dell is fantastic.
The runners-up
Dell blew away its competitors this year, but that doesn't mean theirs was the only great laptop out there. In fact, none other than Microsoft created one of the most interesting and versatile laptops of 2015 with its Surface Book.
Part laptop, part tablet, the Surface Book has a detachable display that turns into a 13-inch slate for watching movies or using as a clipboard with the $60 Surface Pen stylus. But with a starting price of $1,500, the Surface Book is anything but cheap.
You can’t make a best laptops list without mentioning Apple’s incredible Mac Book Pro 13-inch. Though the notebook received largely minor updates for 2015, Apple did add its new Force Touch track pad to the mix, which could eventually provide a new way to interact with apps and programs.
Not to be outdone, Lenovo also introduced an impressive new laptop this year with its La Vie Z. Built in cooperation with NEC,the La Vie Z is both impossibly light and ridiculously thin. And whereas most thin and light notebooks come packed with under powered processors, the La Vie Z rocks a high-speed Intel Core i7 chip.
What’s coming in 2016?
As we did in 2015, we will continue to see a blurring of the line between laptops and tablets next year, specifically when it comes to Windows 10 machines. You can also expect a significantly updated Mac Book from Apple, rather than the minor refreshes we saw in 2015.
Piriform’s CCleaner is a quick and easy to use program which makes your computer faster, more secure and more reliable. CCleaner removes cookies, temporary files and various other unused data that clogs up your operating system. This frees up valuable hard disk space allowing your system to run faster. Removing this data also protects your anonymity meaning you can browse online more securely. The built in Registry Cleaner fixes errors and broken settings to make your computer more stable. The simple, intuitive UI and rapid but powerful cleaning make CCleaner a favourite among novices and techies alike. Professional, Network, Business and Technician Editions of CCleaner are also available for serious users.
Limits suck. In a world of almost unlimited digital content — all the videos, music, texts, and storage you need at a click — bumping up against restrictions feels like being pulled over by the cops when you weren't even speeding. Apple has one of the silliest restrictions around: You can only associate 10 devices with your iTunes account — including just five computers. This Draconian rule is a holdover from the early days of the iTunes Store, when Apple had to make accommodations to the rights owners to make sure you didn't share a movie or album with all your friends. We can only hope that the kings from Cupertino will revise their policy soon. Until then, here's how to remove devices from your iTunes account when you hit the limit. Remove a Computer It's simple to remove a computer from your account — as long as you still have access to the computer in question. On the computer you want to remove: 1. Launch iTunes and click "Store" in the menu. 2. Select "Deauthorize this computer." You'll need to enter your Apple ID and password. If the computer died or you've given it away, your only option is to deauthorize all computers. When you go this route, you'll have to re-authorize the computers you still use. You can only use this nuclear option once a year, so it's better to deauthorize individual machines when you can. To do that, follow these steps: 1. Launch iTunes and click your name. Select "Account Info" from the drop-down menu. 2. Sign in with your Apple ID and password. 3. Under Apple ID Summary, the last item tells you how many computers are authorized for this account. To the right of this you'll see the "Deauthorize All" button. 4. Click the button and confirm that you want to do this. Now you can authorize up to five machines again. Remove an iOS Device If you've enabled automatic downloads, used Family Sharing, or a few other features on an iPhone, iPad, or iPod Touch, you had to associate the device with your account first. If you reach the 10-device limit, you'll need to remove some to add more. 1. Launch iTunes and click your name. Select "Account Info" from the drop-down menu. 2. Sign in with your Apple ID and password. 3. Under iTunes in the Cloud, the first item is "Manage Devices." Click the link next to this. 4. You'll see a list of devices associated with your account. The ones you haven't used recently will have a "Remove" button that you can click. If you've used the device with this account within the past 30, the button won't be clickable. To make the whole thing even more confusing (and frustrating), you might find a completely different list of devices if you look on your iOS device's iCloud settings. That's because your iOS device is showing devices that are currently using your account, while the iTunes list shows devices that are authorized to access downloads, Family Sharing, and other features that require iTunes authentication.
For better or worse, Facebook has become an integral part of daily life for many of us. We rely on it to keep up with family and friends, to stay current on the news, to kill time at work, and to argue with people we haven’t seen since high school about whether or not President Obama is really a Kenyan-born sleeper agent.
But despite the fact that you use it every day, chances are you still don’t know some of the handy tricks and shortcuts that can make life on Facebook a whole lot easier. So to make your time on the world’s largest social network more efficient, here’s our list of essential tips that every Facebook user should know.
1. Control who sees the apps you use
If you log into Facebook with an app like Spotify or Candy Crush, your friends may end up seeing notifications about your app activities in their News Feeds, telling them what songs you listen to and how often you crush said candy. But you can do everyone a favor and hide all that activity from your friends.
1. First go to Facebook on your desktop Web browser.
2. On the left side of the screen, mouse over Apps and click More.
3. Select Settings. Next you’ll see a list of all of the apps that are logged into your Facebook account.
3. To hide an app, hover over it and click the pencil icon.
4. Click the drop-down box next to App Visibility and change it from Friends to Only Me.
2. Turn off annoying game notifications
We all get notifications on our smartphones from Facebook friends asking us to play Pirate Kings or some similar waste of time. Here’s how to kill those notifications.
1. If you use the Android Facebook app, open it up, then tap the More icon (the one with three horizontal lines) in the top-right corner of the screen to open the Settings menu. On the iPhone, that More icon is in the lower-right corner.
2. In the Android app, scroll down and select App Settings. On the iPhone, scroll down to Settings and select Account Settings.
3. Tap Notifications. In Android, move the slider next to Application Requests to the Off position. If you’re using an iPhone, tap Notifications then select Mobile and uncheck the boxes next to Application Requests and Application Notifications.
You’ll never receive another annoying game request again.
3. Disconnect apps from your Facebook account
Even if you don’t use a particular connected app anymore, it could still be collecting information from your Facebook account. Want to turn that off? No problem.
1. Log in to your Facebook account on your desktop, mouse over Apps on the left side of the screen, and click More.
2. Next, click the Settings button at the top of the screen to see which apps are connected to your Facebook account.
3. To disconnect an app on that list, hover over it with your mouse and then click the X button that appears.
4. You’ll then see a dialogue box prompting you to remove the app. Click Remove, and you’re finished.
Once the app is disconnected, it will stop receiving new information from your account. It will, however, still have the information that it had previously collected. If you want the app to delete that info, you’ll have to contact the developer directly.
4. Post to Facebook from Twitter
Ever wanted to post something on both Twitter and Facebook, but didn’t want to retype the same thing in both apps? You can.
1. Log into your Twitter account on your desktop, click your profile image in the top-right corner of the screen and select Settings.
2. Scroll down and click Apps on the left side of the screen.
3. On the next screen, click Connect to Facebook.
4. A new window will pop up asking you to enter your Facebook login information. Enter it and click Okay.
5. Next, choose who you want to see your posts, and click Okay.
And that’s that. Now all of your tweets will automatically be posted to Facebook as well.
5. Download your Facebook information
If you’re like me, you’ve posted a ton of pictures, notes, messages, and status updates on your Facebook account over the years. So what if you wanted to download that same information to your desktop? Here’s how to do it.
1. Log in to Facebook on your desktop, click the arrow in the top-right corner of the screen, and select Settings from the drop-down menu.
2. At the bottom of the next screen you’ll see a small line of text that says, “Download a copy of your Facebook data.” Click Download a Copy and then select Start My Archive on the next screen.
That will initiate the download of an archive — in .zip format — of all of your Facebook information (including photo albums). Be careful where you put this download, though: It could be huge.
6. Download a photo your friend posted of you
Like a lot of people, my Facebook account is home not only to photos I’ve uploaded, but also of pictures of me my friends have posted over the years. You can download those, too.
1. Navigate to Facebook on your desktop and find the photo you want to download.
2. Open the photo and then click the Options button in the lower-right corner of the screen.
3. Select Download from the pop-up menu and choose where you want to save the image.
7. Control who sees your posts
Just because you’re friends with your parents, kids, or boss on Facebook doesn’t mean you want all of them to see everything you post. Fortunately, you can limit who sees your posts.
1. Write your post in the status box as usual.
2. Before you click Post, select the button that says Friends. From the resulting drop-down, you can choose exactly who you want to see your post. You can also choose who you don’t want to see it by clicking Friends and selecting More from the drop-down box, then choosing the Custom option. On the next screen, you can enter the names of people from whom you’d like to hide your post.
3. If you’re using Facebook’s Android or iPhone, you can tap the Friends button, select the Friends Except option from the drop-down menu, and there decide who doesn’t get to see your post.
8. Screen what people post on your Timeline
Let’s face it, at some point one of your friends is going to try posting something on your Timeline that’s either offensive or just outright dumb. Facebook, however, gives you some control over what people can post on your Timeline.
1. If you’re on your computer, navigate to Facebook and click the arrowin the top-right corner of the screen, then select Settings from the drop-down menu. On an Android device open the Facebook app and press the More button in the top-right corner of the screen, then select Account Settings. If you’re using an iPhone, open the Facebook app and press the More button in the bottom-right corner of the screen. Select Settings and then tap Account Settings.
From here, the instructions are the same for desktop, iPhone, and Android users.
2. Select Timeline and Tagging and choose Review Posts Friends Tag You in Before They Appear on your Timeline?
5. Move the slider to the On position in the Facebook and Android apps, or click Enabled if you’re on your desktop machine.
9. Set up login approvals
We keep a lot of personal information on our Facebook accounts. Unfortunately, there are people out there who would love nothing more than to get into your account and steal that information. And while a good password can help protect your account, it isn’t foolproof.
To take your Facebook security a step further, enable Login Approvals. By doing so, you’ll receive a request anytime your account is logged into from an unknown Web browser.
1. Go to your Facebook Account Settings and select Security.
2. Check the box next to Login Approvals.
3. Next, enter the phone number to which you’d like Facebook to send your login approval when someone — you or anyone else — tries to sign in from a new browser.
4. You’ll then be asked to enter an approval code sent to that number. Enter the code in the appropriate dialogue box and press Continue.
Anyone who tries to log into your account without a login code will be locked out.
10. Silence notifications for individual posts and group messages
Few things are more annoying than commenting on one of your friend’s posts, only to receive a deluge of notifications every time someone else comments on the same thread. There is, however, a new way to kill those notifications and win back your piece and quiet.
1. Open Facebook and navigate to the offending post.
2. Select the arrow in the top-right corner of the post and tap on Turn Off Notifications for this Post.